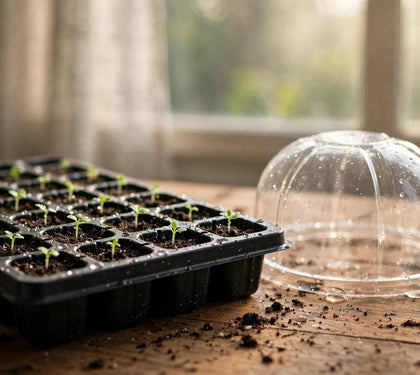


Cloning is the closest thing growing has to a cheat code. A cutting taken from a plant you already know — one you've watched veg, flower, and finish — is a genetic photocopy of that plant. Same vigor, same structure, same terpenes, same finish time. No seed roulette, no pheno hunting, no surprise males. When customers ask us how professional growers get room after room of identical plants, this is the whole answer: they clone, and they clone well.
The good news is that cloning is not hard. It is, however, unforgiving of sloppiness in about six specific places — and every one of them is a habit, not a talent. This is the exact protocol we teach at the counter, the one that gets growers to 90%+ success and keeps them there. Everything mentioned lives in our Propagation collection.
Start with the mother: cloning begins weeks before you cut
A cutting can only be as healthy as the plant it came from. The pros keep dedicated mother plants — vigorous females held in vegetative growth indefinitely, fed a steady veg diet, and never flowered. But even if you're cutting from a regular veg plant before you flip it, these rules hold:
- Cut from health, not from trouble. A stressed, hungry, or pest-carrying mother produces cuttings that root slowly or not at all — and pass her problems to the next generation. If the mother has issues, fix her first and cut in two weeks.
- Feed her the day before. A well-hydrated, well-fed mother gives cuttings full of stored energy. Take cuts from a thirsty plant and you're starting the race with an empty tank.
- Mind the nitrogen. Here's a subtlety most guides skip: heavily nitrogen-loaded, dark-green, soft growth roots slower. Many experienced growers ease the mother off high-nitrogen feed for a few days before a big round of cuts, so the tissue is a little hungrier for rooting. It's a refinement, not a requirement — but it's real.
- Never cut from a plant you haven't verified. Cloning a plant that later turns out male, or worse, carries a pathogen like hop latent viroid, multiplies a problem instead of a plant. Know your mother. (We covered that invisible threat in depth in our HLVD guide.)
The tools: clean, sharp, ready before the first cut
Lay everything out before you touch the plant. A cutting is an open wound with a countdown timer — once it's off the mother, you want zero fumbling.
- A new or sterilized blade. A fresh razor or scalpel, or scissors wiped down with 70% isopropyl alcohol between plants. Dull blades crush stem tissue instead of slicing it, and crushed tissue rots instead of rooting. Sterilizing between mothers is how you avoid spreading disease through an entire tray in one afternoon.
- Rooting hormone. Gel is the shop standard — it clings to the cut where powder washes off. The 100 mL Clonex Rooting Gel is $26.49 on our shelf and lasts most home growers a year of cuttings.
- Your rooting medium, pre-soaked. Plugs, cubes, or an aeroponic cloner — have it wet, pH'd, and waiting (details below).
- A dome tray or cloner, a spray bottle, and a mild clone nutrient. Clonex Clone Solution — $27.49 a quart, $76.99 a gallon — is the standard light feed for the rooting phase; a 20 mL packet at $2.19 covers a small batch if you're just trying the method.
The full lineup of gels, solutions, plugs, domes, and cloners is in Clonex and the broader Propagation collection.
The cut, step by step
- Choose the branch. You want a healthy growing tip with 2–4 nodes — roughly 4–6 inches of growth. Lower, slightly woodier branches root a touch slower than soft top growth but produce sturdy clones; avoid anything thin, pale, or damaged.
- Cut below a node, at an angle. Make the cut just beneath a node — that's where root-producing tissue concentrates — and cut at a 45° angle to maximize the surface area that will callus and root. One confident slice, no sawing.
- Trim the cutting immediately. Remove the lower leaves entirely. Cut the remaining large leaves in half across the blade — this looks brutal and is essential: it halves the water the leaf transpires while the cutting has no roots to replace it, and it keeps leaves from lying on wet medium and rotting.
- Re-cut under water if you're working slowly. Air can enter the stem's plumbing (an embolism) and block uptake. Production growers keep a cup of water at the bench and make the final cut submerged. On a small batch done quickly, going straight to gel is fine — just don't let cuttings sit on the bench while you chat.
- Dip in gel, then into the medium. Coat the bottom half-inch to an inch of stem, and insert it into your plug or cube so the cut end is fully surrounded. Firm the medium gently around the stem — contact is what you're after.
- Label everything. Strain, mother, date. Every grower who skips this swears they never will again, usually while staring at a tray of identical mystery clones.
Plugs, cubes, or aeroponic: pick your rooting system
| System | How it roots | Typical rooting time | Honest trade-offs |
|---|---|---|---|
| Rooting plugs (peat/coir) in a dome | Cutting sits in a moist plug; high humidity prevents wilting while roots form | 7–14 days | Cheapest, simplest, most forgiving — the shop's recommendation for first-timers. Transplant shock is minimal since the plug goes straight into the pot |
| Rockwool cubes in a dome | Same dome method, inert mineral medium | 7–14 days | Clean, consistent, beloved by hydro growers since clones drop straight into systems. Needs a pre-soak to correct its naturally high pH, and holds water so well it punishes over-misters |
| Aeroponic cloner | Stems hang in air, misted with nutrient solution on a timer | 5–10 days, often visibly faster | Fastest roots and near-zero wilting — but it costs more, has moving parts, and warm reservoir water grows pathogens enthusiastically. Water temperature discipline is the whole game (see below) |
| Straight into soil/coco | Cutting planted directly in its final medium under a dome or bag | 10–18 days | No transplant step at all, and it works — but the slowest and least consistent of the four. Fine for a couple of cuts, frustrating for a tray of thirty |
Whichever you choose, the environment rules below are what actually decide your percentage. The medium is the vehicle; the climate is the driver.
The rooting environment: where clones are won or lost
Humidity: high, then stepping down. A fresh cutting has no roots, so it "drinks" through its leaves — it needs 80–90% relative humidity the first few days or it wilts faster than it can root. A closed dome gets you there. But a sealed dome forever grows mold and lazy clones, so from about day 3–4, crack the vents a little more each day. You're weaning the cutting: forcing it to start working for water is what tells it to hurry up and grow roots.
Temperature: warm roots, mild air. Root-zone temperature is the throttle on rooting speed. 72–78°F at the plug is the sweet spot — a heat mat under the tray (the same mats from seed starting earn their keep here) holds it steady. Air temperature a bit cooler than the root zone, around 70–75°F, is ideal: warm bottoms, cool tops is the oldest propagation rule there is. In an aeroponic cloner, the same logic applies to your reservoir — let it creep into the 80s and you've built a pathogen incubator.
Light: gentle and long. Cuttings need light for energy but have no way to handle intensity — strong light just makes them transpire and yellow. Soft light is the answer: a mild LED or fluorescent at a distance, or the low setting on a dimmable fixture, for 18 hours a day. If your clones look bleached or are sweating under the dome, the light is too much, not too little.
Feed: barely. Rooting is not growing. A very light clone solution — around 0.4–0.6 EC — in your plug soak or cloner reservoir is plenty. Full-strength veg feed on an unrooted cutting is a classic beginner error: the cutting can't use it, and the salts stress tissue that's already fighting to survive.
The daily rhythm, and the failures it prevents
Once a day: lift the dome, let the tray breathe for a few minutes, check moisture (plugs should be damp like a wrung-out sponge, never soggy, never dry), and mist leaves only if they're flagging. In a cloner, check the reservoir temperature and top up. That's it. The rest is patience.
The failures we see at the counter map to specific steps above: wilting in the first 48 hours means humidity or leaf size — dome closed, big leaves trimmed. Stems turning to mush at the base means rot — medium too wet, tools weren't clean, or the cloner water ran hot. Yellowing leaves around day 7–10 is usually normal hunger as the cutting spends its stored energy — and it's often a good sign, arriving right before roots do. No roots by day 14 in plugs usually traces back to cold root zones or a mother that was in rough shape. Notice the pattern: nearly every failure was decided before or during the cut, not after it.
When white roots are poking out of the plug or hanging an inch long in the cloner, you're done — transplant gently into your medium, water in with a light feed, and give them a day or two of the same gentle light before moving them under real veg intensity. A rooted clone is a small plant with a big future and a still-delicate root system; treat the first week after transplant like a landing, not a launch.
Anthony's Take: “Use sterile cutting equipment! A nice fresh scalpel will ensure you have no risk of contamination — they are sterilized with gamma radiation (like the Incredible Hulk!)”
Frequently asked questions
How long should cloning take, start to finish?
Most healthy cuttings show roots in 7–14 days in plugs or cubes, and 5–10 days in a well-run aeroponic cloner. If nothing has happened by day 14, something in the environment is off — check root-zone temperature first, then the health of the mother the cuts came from. By day 21 with no roots, take fresh cuttings rather than continuing to nurse the batch.
Do I really need rooting gel? Will water alone work?
Water alone works — eventually, and with a lower success rate. Rooting hormone contains the same auxins the plant uses to initiate roots, in a dose that speeds callusing and improves consistency across a whole tray. For a couple of experimental cuts, skip it. For a tray you care about, gel is the cheapest insurance in the whole process.
Why do I cut the leaves in half? It looks wrong.
Because a cutting loses water through its leaves but has no roots to replace it. Halving the big leaves halves the water loss, keeps the cutting turgid under the dome, and stops leaf tips from lying against wet medium where they'd rot. It looks brutal for a week and then the clone grows normal leaves like it never happened.
Can I take clones from a flowering plant?
You can — it's called monster cropping, and the clones will root, then go through a strange reveg phase of single-blade leaves before returning to normal growth. It works as a rescue for genetics you forgot to clone in veg, but it adds weeks and weirdness. The standard practice is to cut in veg, before the flip, from a plant you know.
My cuttings keep rotting at the stem. What's the fix?
Three suspects, in order: your medium is too wet (plugs should feel like a wrung-out sponge, not a soaked one), your tools or tray weren't sterilized, or your water is too warm — cloner reservoirs in the 80s grow rot fast. Fix all three and the problem almost always disappears.
Want to watch your success rate climb? Bring us a photo of your cloning setup — or better, your failing tray — and we'll find the weak step. Everything in this guide is stocked in Propagation at Green Harvest Hydroponics, 82 Newbury St in Peabody, and the crew clones everything from houseplants to the shop's own stock. We're open Mon–Sat 10–6 and Sun 10–3, at 978-278-5898, and online anytime at ghhydro.com.